SAStrutsでAjaxリクエストのエラーメッセージを表示する方法

SAStrutsでは、入力チェックをFormのアノテーションや、メソッドを定義することで実行することができます。
特にFormのアノテーションによるチェックは、表示するエラーメッセージの処理を独自で書く必要がなく、フレームワークで請け負ってくれるため非常に便利です。

しかし、エラーメッセージの表示には画面の再描画(画面遷移)が必要となるため、Ajaxによる非同期通信ではこの恩恵を受けることができません。

そこで、AjaxリクエストでもFormのアノテーションによる入力チェックと、エラーメッセージの表示を行う方法を紹介します。

環境

入力画面

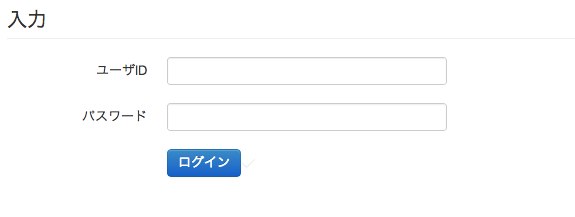
まずは、入力画面の抜粋です。入力項目に「ユーザID」と「パスワード」を準備しました。「ログイン」ボタンは、Ajaxで処理するため[type="button"]としています。対応するFormクラスでは、「ユーザID」と「パスワード」の両方に[@Required]を設定します。

<!-- Ajax処理のエラーメッセージ表示域 -->
<div id="ajaxErrorMessage"></div>

<!-- Ajax処理のリクエストパラメータ -->
<s:form styleId="form" styleClass="form-horizontal">
<legend>入力</legend>
<div class="control-group">
 <label class="control-label">ユーザID</label>
 <div class="controls">
  <html:text property="userId" styleId="userId" styleClass="input-xlarge" maxlength="10"/>
 </div>
</div>
<div class="control-group">
 <label class="control-label">パスワード</label>
 <div class="controls">
  <html:password property="passwd" styleId="passwd" styleClass="input-xlarge" maxlength="15"/>
 </div>
</div>
<div class="control-group">
 <div class="controls">
  <input type="button" class="btn btn-primary" id="login" name="login" value="ログイン"/><i class="icon-ok icon-white"></i>
 </div>
</div>
</s:form>

https://lh6.googleusercontent.com/-Z7dRrnRuenI/UNBeW5jyIgI/AAAAAAAANyY/gxDLGGBFN4U/s800/inputform.jpg

Actionクラス

Actionクラスでは、Ajaxを受け付けるloginメソッドと、入力エラー時処理を行うajaxErrorメソッドを準備しました。Executeアノテーションのvalidate属性に[@]とし、Formクラスのアノテーションによる入力チェックを実行します。

    @Execute(validator=true, validate="@", input="ajaxError")
    public String login(){
     
     /* ログイン処理 */
     
     /* レスポンスに対する処理 */

     return null;
    }
    
    @Execute(validator=false)
    public String ajaxError(){
     
     /* リクエストからメッセージオブジェクトを取出す。 */
     HttpServletRequest request = RequestUtil.getRequest();
     ActionMessages messages = (ActionMessages)request.getAttribute(Globals.ERROR_KEY);
     if(messages==null) return null;
     
     /* application(_ja).propertiesの定義を利用してメッセージを生成する。 */
     List<String> messageList = new ArrayList<String>();
     for(Iterator<?> iter = messages.get(); iter.hasNext();){
      ActionMessage msg = (ActionMessage)iter.next();
      messageList.add(MessageResourcesUtil.getMessage(msg.getKey(), msg.getValues()));
     }
     
     /* 
       メッセージをjson形式に変換して、レスポンスを返す。 
       ここで設定している[status]は、JavaScript側でエラーの有無を判断するのに利用する属性です。
     */
     Map<String, Object> map = new HashMap<String, Object>();
     map.put("status", false);
     map.put("messages", messageList);
     String json = JSON.encode(map);
     ResponseUtil.write(json);
     
     return null;
    }

JavaScript

入力エラーの場合に、json形式で返されたメッセージを整形して表示する処理を定義しています。あと、serializeArray()はForm要素内の入力値をjson形式で返します。便利なのでオススメです。

<script>
//ログインボタン イベントのバインド
$(document).ready(function(){
 $('#login').bind('click', function(event){
  validator();
 }); 
});

//ログインボタン押下処理
function validator(){
 $.ajax({
  type:'get',
  dataType:'json',
  url:'${f:url("/login")}',
  cache:false,
  data:$('#form').serializeArray(),
  success:function(json){
   if(json.status==false){
    //エラーが発生した場合、エラーメッセージを表示する要素を組立てる。
    var elem = '<div class="alert alert-error"><ul>';
    for(i in json.messages){
     elem += '<li>'+json.messages[i]+'</li>';
    }
    elem += '</ul></div>';
    //Ajax処理のエラーメッセージ表示域に、エラーメッセージを挿入する。
    $('#ajaxErrorMessage').html(elem);
    return;
   }
   //正常時処理
  },
  error:function(jqXHR, textStatus, errorThrown){
   //異常時処理
  }
 });
}
</script>

実行結果

エラーメッセージが表示されました。
https://lh5.googleusercontent.com/-7vyZqLx4N7M/UNBd9nOSx5I/AAAAAAAANyA/Ef6Q0lofq5Q/s800/showmessage.jpg

まとめ

これで、AjaxリクエストでもFormのアノテーションによる入力チェックと、エラーメッセージの表示を行うことができました。通常の入力チェック処理と、Ajaxの入力チェック処理を分けることなく実装できるので開発効率も良いのではないでしょうか。

ではでは(*´ω`*)ノシ

Apache連携でも同じ! Tomcat6でBasic認証を行うための設定

Apache/Tomcat連携してWebアプリケーションを運用して、Basic認証でアクセス制限をかけることを検討しているとします。


Apache側でかけるのか?
Tomcat側でかけるのか?
あれ?ってなりませんか?


結論からいうと、Tomcat側で仕掛けます。


Apacheでは、80ポートのリクエストで特定URLを、AJPプロトコルTomcatに連携します。
よって、Apache配下のディレクトリを利用しないため、httpd.conf内のDerectoryディレクティブの「AuthType Basic」設定はできません。


というわけで、Tomcat側で仕掛けることになります。
(どやー!って感じでいうことでもないんですが。)


さて、前置きが長くなりましたが、Tomcat6でアプリ毎にBasic認証を行う設定をメモしておきます。

検証環境

OS Linux
Apache Apache/2.2.16 (Unix)
Tomcat Apache Tomcat/6.0.32

Webアプリケーションのweb.xml

(の次あたりに追記)

    <security-constraint>
        <web-resource-collection>
            <web-resource-name>FOR_DEMO</web-resource-name>
            <url-pattern>/*</url-pattern>
        </web-resource-collection>
        <auth-constraint>
            <role-name>demouser</role-name>
        </auth-constraint>
    </security-constraint>

    <login-config>
        <auth-method>BASIC</auth-method>
        <realm-name>FOR DEMO</realm-name>
    </login-config>

参考:http://www.sk-jp.com/java/servlet/webxml.html

ここで重要なのは、の値です。後述するtomcat-users.xmlと関連付けます。

$TOMCAT_HOME/conf/tomcat-users.xml

<tomcat-users>
  <role rolename="demouser"/>
  <user username="[ユーザ名]" password="[パスワード]" roles="demouser"/>
</tomcat-users>

userタグのroles属性に、web.xmlに設定した値を設定することで関連付けます。


これで完了です。

まとめ

この方法を使うと、アプリケーション毎にBasic認証でアクセス制限をすることができます。
もちろん、Apache2.2/Tomcat6.0連携で名前ベースのVirtualHostを実現する方法 - DISってHONEY♪ @gungnir_odinに書いた方法で、複数ドメインを運用している場合も使用することができるので、使い方の幅が広がりますね。

Apache2.2/Tomcat6.0連携で名前ベースのVirtualHostを実現する方法


最近は、ハードウェアのコストが安くなり、潤沢なリソースを利用することが多くなりました。
これにより、1つのサーバで1つのアプリケーションを運用するとリソースが余るので、複数のアプリケーションを運用したいが、ドメインは分けたいということがあるのではないでしょうか。

そこで、今回は、1つのサーバ(IP)で複数ドメインを使用することを実現する、名前ベースのVirtualHostという機能を紹介します。
また、Apache単体での利用ではなく、Javaで構築したWebアプリケーションをTomcatで動作させ、ajpプロトコルで連携する方法も組み合わせて紹介します。

検証環境

OS Linux
Apache Apache/2.2.16 (Unix)
Tomcat Apache Tomcat/6.0.32

DNSの設定

今回は、名前ベースによるVirtualHostですので、1つのIPに対して、複数のドメインを設定します。設定方法は、使用しているDNSサービスの使用方法を確認して下さい。

ドメイン レコード
domainA A 192.168.1.2
domainB CNAME domainA.jp

もっとドメインを増やす場合は、domainBに倣って追加することができます。

/etc/httpd/conf/httpd.conf の設定

以下の設定がされていることを確認します。

#
# Load config files from the config directory "/etc/httpd/conf.d".
#
Include conf.d/*.conf
#
# Use name-based virtual hosting.
#
NameVirtualHost *:80

/etc/httpd/conf.d/virtualhost.conf の設定

conf.dフォルダに設定ファイルを作成します。ファイル名は拡張子が「conf」であればOKです。適宜、名称を付けましょう。

<VirtualHost *:80>
    ServerName domainA.jp
    ProxyRequests Off
    ProxyPass /applicationName1/ ajp://localhost:8009/applicationName1/ 
</VirtualHost>

<VirtualHost *:80>
    ServerName domainB.jp
    ProxyRequests Off
    ProxyPass /applicationName2/ ajp://localhost:8009/applicationName2/ 
</VirtualHost>

まとめ

名前ベースのVirtualHostについては、リソースの有効活用という面では有益です。運用についてもサーバ1台を管理すれば良いので手間も省けます。
しかし、冗長性の面からするとサーバ1台の不具合によって、2つのアプリケーションがダウンすることになるため、被害が2倍になることも考慮した上でVirtualHostによる運用を決める必要があると思います。

Tomcat6でオリジナルのエラーページを設定する方法

Tomcatを利用したWebアプリケーションを作成した場合に、エラーページをデフォルトのままにしていませんか?

https://lh4.googleusercontent.com/-JZRfG-Cy7Jw/UJE8XwMXiDI/AAAAAAAANrM/rgPuVEZYqzY/s800/Apache%2520Tomcat_6.0.32%2520-%2520Error%2520report.jpg

ユーザにとっては、Webアプリケーションの画面デザインと大きくかけ離れた画面は衝撃的であり、ユーザに不信感を与えてしまいます。

Tomcatでは、Apacheと同様にHTTPステータスコードに対して、それぞれエラーページを設定することができるので、Webアプリケーションと統一感のある独自のエラーページを設定しましょう。

例として、ステータスコード404と500のエラーページを設定しています。その他のステータスコードについては、以下のリンクを参照して下さい。

HTTPステータスコード - Wikipedia

web.xml

web.xmlに、error-pageディレクティブを追加します。

<error-page>
  <error-code>404</error-code>
  <location>/WEB-INF/view/error/404.jsp</location>
</error-page>
<error-page>
  <error-code>500</error-code>
  <location>/WEB-INF/view/error/500.jsp</location>
</error-page>

まとめ

SAStrutsを利用しているなら、locationの値に[*.jsp]とすることで[common.jsp]が読み込まれ、[f:url]などのtaglibが利用できるようになります。

これにより、スタイルシートへのパス等に悩まされることがないのでオススメです。

意外と簡単。Jenkinsとbitbucket(Git)を連携する7ステップ

Jenkinは、VCS(バージョン管理システム)と連携することが多いと思います。
今回は、Git*1ホスティングサービスを提供しているbitbucketとJenkinsを連携します。

Jenkinsサーバ環境
OS CentOS release 5.8 (Final)
Jenkins version 1.466.2 on Tomcat

bitbucketとの公開鍵認証のため鍵ペアを生成

Jenkinsサーバで、bitbucketとの公開鍵認証に利用する鍵ペアを生成します。
出力先はホームディレクトリの「.ssh」フォルダにします。

# ssh-keygen
Generating public/private rsa key pair.
Enter file in which to save the key (/root/.ssh/id_rsa): /root/.ssh/id_rsa_bitbucket
Enter passphrase (empty for no passphrase): [←パスフレーズは空のままEnter]
Enter same passphrase again: [←パスフレーズは空のままEnter]

こんな感じに生成されます。

-rw------- 1 root root 1671  920 20:11 id_rsa_bitbucket
-rw-r--r-- 1 root root  394  920 20:11 id_rsa_bitbucket.pub

bitbucketに公開鍵を登録

生成した鍵ペアの公開鍵「id_rsa_bitbucket.pub」のテキストをbitbucketにコピペします。
まず、bitbucketのサイトにログインして、[ユーザ名]-[Account]をクリック。画面の左メニューの[SSH keys]を選択します。

[Label]には、適当な名前を入力(空でもOK)し、[SSH Key]に公開鍵「id_rsa_bitbucket.pub」のテキストをコピペします。ちなみにテキストの末尾にある「@」は必要ありません。

https://lh4.googleusercontent.com/-DJvhXUsq98w/UF0gYGX2eLI/AAAAAAAANTs/WPHIN3bWg5M/s640/gungnir_odin%2520_%2520ssh%2520keys%2520%25E2%2580%2594%2520Bitbucket.jpg

参考:https://confluence.atlassian.com/display/BITBUCKET/How+to+install+a+public+key+on+your+bitbucket+account

sshの設定ファイルを編集

ssh接続の設定をします。設定ファイルに以下の記述を追記します。設定ファイルがない場合は作成しましょう。

# vi /root/.ssh/config

Host bitbucket
    Port 22
    Hostname bitbucket.org
    IdentityFile ~/.ssh/id_rsa_bitbucket
    TCPKeepAlive yes
    IdentitiesOnly yes

CentOSにGitをインストール

Gitを利用するためGit環境を作ります。デフォルトでは、yumリポジトリにGitが含まれてないので、リポジトリを追加する必要があります。

# cd /usr/local/src
# sudo wget http://dag.wieers.com/packages/rpmforge-release/rpmforge-release-0.3.6-1.el5.rf.i386.rpm
# sudo wget http://dag.wieers.com/packages/RPM-GPG-KEY.dag.txt
# rpm -ivh rpmforge-release-0.3.6-1.el5.rf.i386.rpm

このリポジトリを必要な時だけ参照するように設定します。

# vi /etc/yum.repos.d/rpmforge.repo

#enabled = 1
enabled = 0

これでGitをyumでインストールすることができます。

# yum -y --enablerepo=rpmforge install git

インストールされたことを確認してみましょう。

# git --version
git version 1.7.11.3

Jenkinsサーバはビルド専用なので、全リポジトリ用の設定を行います。

git config --system user.email "jenkins@....."
git config --system user.name "jenkins"

JenkinsにGitプラグインをインストール

[Jenkinsの管理]-[プラグインの管理]-[利用可能]タブを選択して、[フィルター]に「Jenkins GIT plugin」と入力します。一覧に表示された「Jenkins GIT plugin」にチェックし「再起動せずにインストール」をクリックしてインストール完了です。

https://lh6.googleusercontent.com/-BUeaVH6E-58/UF0eI0PZUJI/AAAAAAAANS0/fL5v4ylvxJk/s640/%25E3%2582%25A2%25E3%2583%2583%25E3%2583%2595%25E3%2582%259A%25E3%2583%2586%25E3%2582%2599%25E3%2583%25BC%25E3%2583%2588%25E3%2582%25BB%25E3%2583%25B3%25E3%2582%25BF%25E3%2583%25BC%2520%255BJenkins%255D.jpg

Jenkinsのプロジェクト設定でGitの設定

プロジェクトの[設定]から、[ソースコード管理システム]の設定をします。
[Git]を選択して、[Repositories]に以下のように入力します。

git@bitbucket:<bitbucketのUsername>/<reposotory名>.git

https://lh3.googleusercontent.com/-jbR6ymK-C60/UF0eH4Q2a1I/AAAAAAAANSk/13TsIsR-wPA/s640/radiationMap%2520Config%2520%255BJenkins%255D.jpg

Jenkinsでビルド実行

さて、いよいよJenkinsでビルドを実行します。
[ビルドの実行]をクリックしましょう。

https://lh4.googleusercontent.com/-3NG4I2aRYvo/UF0gYML2zaI/AAAAAAAANTs/KDzM26B7bBY/s800/radiationMap%2520%252318%2520%255BJenkins%255D.jpg

まとめ

大きく分けて、Jenkinsサーバの設定、bitbucketの認証設定、及びJenkinsのGitリポジトリの設定を行うことで連携することができました。これを応用すればgithubや、オンプレのgitosisとの連携もできると思います。参考にして下さい。


No Jenkins, No Development Life.

*1:Mercurialもあるよ

JenkinsでFindBugsを実行するまでの環境設定

Jenkinsを導入したので、FindBugsを使ってソースコードを静的解析し、潜在的なバグの可能性のある箇所を指摘してもらうまでの手順です。

インストール環境

今回のサーバ環境は、以下のとおりです。

$ less /etc/redhat-release
CentOS release 5.8 (Final)

Antをインストール

Apache Ant - Binary Distributions から最新版をダウンロードして転送するか、Jenkinsサーバからwgetでダウンロードします。解凍して /usr/local/ に置きました。

# tar zxfv apache-ant-1.8.4-bin.tar.gz
# mv apache-ant-1.8.4 /usr/local/ant

環境変数の設定

Antの環境変数と、Antにパスを通します。

# vi /etc/profile

以下を追記。

export ANT_HOME=/usr/local/ant
export PATH=$PATH:$ANT_HOME/bin

設定を反映しましょう。

# source /etc/profile

FindBugsをインストール

FindBugs Downloads から最新版をダウンロードしてjenkinsサーバに転送します。解凍して /usr/local/ に置きました。

# tar zxfv findbugs-2.0.1.tar.gz
# mv findbugs-2.0.1 /usr/local/findbugs

環境変数の設定

FindBugs環境変数と、FindBugsにパスを通します。

# vi /etc/profile

以下を追記。

export FINDBUGS_HOME=/usr/local/findbugs
export PATH=$PATH:$FINDBUGS_HOME/bin

設定を反映しましょう。

# source /etc/profile

Antタスクのインストール

$FINDBUGS_HOME/lib/findbugs-ant.jar を $ANT_HOME/lib/にコピーします。

# cp $FINDBUGS_HOME/lib/findbugs-ant.jar $ANT_HOME/lib/

build.xmlを修正

FindBugsのタスクを追加します。この辺はプロジェクトで違ってくるので参考までに例として載せます。
ここでポイントは、auxClasspathに解析が必要ないライブラリを追加しておくことです。pathタグで除外するファイル群を指定して、auxClasspathのrefidに設定しましょう。

<!-- ビルドに必要なファイル群 -->
<path id="build.classpath">
    <fileset dir="lib">
        <include name="*.jar"/>
    </fileset>
    <fileset dir="${build.webinf}/lib">
        <include name="*.jar"/>
    </fileset>
    <fileset dir="/usr/local/tomcat/lib">
        <include name="*.jar"/>
    </fileset>
</path>

<property name="build.OutputDir" value="src/main/webapp/WEB-INF/classes"/>
<property name="build.SourceDir" value="src/main/java"/>

<!-- - - - - - - - - - - - - - - - - -
          findbugsを実行     
   - - - - - - - - - - - - - - - - - -->
<property environment="env" />
<condition property="have.findbugs">
    <and>
        <available classname="edu.umd.cs.findbugs.anttask.FindBugsTask" />
        <available file="${env.FINDBUGS_HOME}" />
    </and>
</condition>
<target name="Findbugs" if="have.findbugs">
    <taskdef name="findbugs" classname="edu.umd.cs.findbugs.anttask.FindBugsTask" />
    <findbugs home="${env.FINDBUGS_HOME}" effort="max" output="xml" outputFile="findbugs.xml" >
        <auxClasspath refid="build.classpath" />
        <sourcePath path="${build.SourceDir}" />
        <class location="${build.OutputDir}" />
    </findbugs>
</target>

プロジェクトの設定

「ビルド後の処理」に「FindBugs警告の集計」を追加します。
https://lh4.googleusercontent.com/-ULu4b9KTvaI/UEYL3JfpotI/AAAAAAAANSE/C1l032ku1m4/s800/01_radiationMap_Config_%255BJenkins%255D.jpg


すると左メニューに「FindBugs警告」が追加されます。
https://lh6.googleusercontent.com/-u2YSL5YXEAk/UEYL3GXXo1I/AAAAAAAANR8/_i3A5FJESnU/s800/02_radiationMap%2520%255BJenkins%255D.jpg


ビルド実行後には、「状態」画面にも「FindBugs警告の推移」グラフが表示されるようになります。
https://lh5.googleusercontent.com/-73c7YmVVx9U/UEYL3AT2pHI/AAAAAAAANSA/ujp2AcuW0M4/s800/03_FindBugs%25E8%25AD%25A6%25E5%2591%258A%25E3%2581%25AE%25E6%258E%25A8%25E7%25A7%25BB%2520%255BJenkins%255D.jpg

まとめ

FindBugsでコードの静的解析結果を視覚的に把握できるようになり、ケアレスミスによるバグを未然に把握し修正することができます。

今までは、各開発環境上で確認する運用だったものが、Jenkinsで実行することで、いつ時点のビルドで、どのような状態であったかを記録することができ、開発者の間で共有できるようになりました。これによって、またひとつ、煩雑な手作業を自動化でき、属人的な作業から開放されますね(・∀・)

PhoneGapでやらずにはいられない!! GPSセンサーを使うサンプルを紹介します。

GPSセンサーを搭載したスマートフォンが広まったことで、位置情報を利用したサービスやゲームが増えてきました。また、アプリの企画をブレストすると、GPSセンサーはカメラと並んで人気がありますね。
そこで、今回は、PhoneGapを利用してAndroid端末に搭載されているGPSセンサーから現在地情報を取得するサンプルを紹介します。

さて、シグニチャです。

今回は、ボタンを押下することで現在の位置情報をを取得します。

navigator.geolocation.getCurrentPosition(geolocationSuccess, geolocationError, [geolocationOption]);

参考:PhoneGap API Documentation

geolocationOptions

maximumAge

設定した時間以内でキャッシュされた位置情報を取得します。

設定値 ミリ秒単位で設定(デフォルトは10000)
timeout

コールバック関数 geolocationSuccess が呼ばれるまで待機する時間を設定します。

設定値 ミリ秒単位で設定

geolocationSuccess

取得した位置情報が引数として渡されますので、データの処理を記述します。

function(position){
    // geolocationSuccess
    $('#geolocation_position').html(
        '緯度: '    + position.coords.latitude          + '<br>' +
        '経度: '    + position.coords.longitude         + '<br>' +
        '高度: '    + position.coords.altitude          + '<br>' +
        '位置精度: ' + position.coords.accuracy          + '<br>' +
        '高度精度: ' + position.coords.altitudeAccuracy  + '<br>' +
        '方位: '    + position.coords.heading           + '<br>' +
        '速度: '    + position.coords.speed
    );

    // 取得した日時を表示
    $('#geolocation_timestamp').html('日付:'+new Date(position.timestamp).toString());

    // ボタンを表示し地図を表示するインテントをhrefに設定
    $('#geolocation_viewmap')
        .attr('href', 'geo:'+position.coords.latitude+','+position.coords.longitude)
        .css('display', 'block');
    }
position
position.coords.latitude 緯度
position.coords.longitude 経度
position.coords.altitude 高度
position.coords.accuracy 位置精度
position.coords.altitudeAccuracy 高度精度
position.coords.heading 方位
position.coords.speed 速度
position.timestamp 情報を取得した日時のミリ秒

geolocationError

GPSセンサーの情報が取得できなかった場合に実行されます。メッセージの表示や代替の処理を記述します。

function(error){
    // geolocationError
    alert(error.message);
}
error
error.code エラーコードが格納されています。定数についてはこちら
error.message エラーメッセージが格納されています

サンプルソース

<!DOCTYPE HTML>
<html>
<head>
<title>PhoneGap Showcase</title>
<meta name="viewport" content="width=device-width, initial-scale=1">
<meta charset="utf-8"/>
<link rel="stylesheet" href="jquery.mobile-1.0.min.css" type="text/css" media="all">
<link rel="stylesheet" href="jquery.mobile.structure-1.0.min.css" type="text/css" media="all">
</head>
<body>
    <div data-role="page" id="geolocation">        <div data-role="header">
            <a data-role="button" data-icon="back" data-rel="back" data-direction="reverse">戻る</a>
            <h1>Geolocation Showcase</h1>
        </div>
        <div data-role="content">
            <a id="geolocation_getPosition" href="#" data-role="button">現在地を取得する</a>
            <div id="geolocation_position"></div>
            <div id="geolocation_timestamp"></div>
            <a id="geolocation_viewmap" href="#" style="display:none;" data-role="button">取得した現在地を地図表示する</a>
        </div>
    </div>
</body>
<script type="text/javascript" charset="utf-8" src="jquery-1.7.1.min.js"></script>
<script type="text/javascript" charset="utf-8" src="jquery.mobile-1.0.min.js"></script>
<script type="text/javascript" charset="utf-8" src="phonegap-1.2.0.js"></script>
<script type="text/javascript">
$(function(){
    document.addEventListener("deviceready",
        function(){
            $('#geolocation_getPosition').attr('href', 'javascript:getPosition()');
        },
		false);
})
/* 
 * GPSセンサーから現在の方位を取得
 */
function getPosition(){
     navigator.geolocation.getCurrentPosition(
        function(position){
            // geolocationSuccess
            $('#geolocation_position').html(
                '緯度: '    + position.coords.latitude          + '<br>' +
                '経度: '    + position.coords.longitude         + '<br>' +
                '高度: '    + position.coords.altitude          + '<br>' +
                '位置精度: ' + position.coords.accuracy          + '<br>' +
                '高度精度: ' + position.coords.altitudeAccuracy  + '<br>' +
                '方位: '    + position.coords.heading           + '<br>' +
                '速度: '    + position.coords.speed
            );
            $('#geolocation_timestamp').html('日付:'+new Date(position.timestamp).toString());
            $('#geolocation_viewmap')
                .attr('href', 'geo:'+position.coords.latitude+','+position.coords.longitude)
                .css('display', 'block');
        },
        function(error){
            // geolocationError
            alert(error.message);
        },
        {
             enableHighAccuracy : true,
             timeout : 5000,
             maximumAge : 5000,
        }
    );
}
</script>
</html>

GPSセンサーから位置情報を取得
https://lh6.googleusercontent.com/-pw8geqxlhgI/TvsHOEDSyTI/AAAAAAAALII/XHUCbooZSDg/s800/geolocation.jpg

取得した位置情報の緯度、経度をつかってMapを表示
https://lh3.googleusercontent.com/-b8XTJsU4oWM/TvsHO8LQb-I/AAAAAAAALIM/XwT9qWV0JTw/s800/geolocation_to_map.jpg

まとめ

今回のサンプルのように現在地を取得して連携することで周辺情報を提供するサービスや、今回は紹介しませんでしたが、一定間隔ごとに位置情報を取得し移動したルートを利用したサービスなど、位置情報を活用したアプリはこれからもっと増えていくことでしょう。また、位置情報をユニークに利用したアプリを考えるのも楽しそうですね。

さて、これまで4回にわたってAndroid端末に搭載されているセンサー系のサンプルを紹介しました。「センサーから情報を取得する」となると難しそうなイメージがありますが、紹介したサンプルを見ると難しいことはありません。尻込みすることなく自分のアイデアをどんどん形にしてみてはいかがでしょうか。私の記事が少しでも役に立ち、はじめの一歩の背中を押せれば幸いです。